

If you are a gaming fan, you will love the features and power of the PS4. The gaming console is absolute fun, and you can marvel for hours with the high-resolution gameplay, hundreds of gaming options to choose from, and play for hours. Whether you like action games, strategic games, or want to go on a rampage, to kill zombies everywhere, you will find your hands full with your PS4. So what about compatibility, sometimes you don’t have a screen available at home as someone is watching a tv program or worst case is when you have your gaming hat on and your TV is out for repairs! On such situations, many gamers wonder as to how to use laptop as monitor for ps4. It will allow the players to get straight into action using their computer and not have to wait for their turn on the TV ever again!
How to use Laptop as Monitor for Sony PS4
It is not as simple as merely connecting a cable from your gaming console to the laptop, and you’re ready to play the game. If only it were that easy, everyone had been doing it for a PlayStation to laptop connection. Is it even possible to make such connections? The answer is yes, it is possible, but it is a tricky process to handle, and you need to put your thinking cap on when you go about making the connection.
You need a video input compatibility with your laptop to play PS4 games, however, in most laptops the options of such connections are not available and if you think you can easily decode a solution to this problem you have more to learn. You cannot just attach the HDMI cable to the notebook and start playing games on your laptop screen. The HDMI connection is one-directional, and it does not support a two-way link. The ports for HDMI, for both the laptop and the ps4, are output port, so you cannot make a connection between them and get anything on the laptop screen.
There are two ways you can follow, and you will have the connection to use the laptop screen as a monitor for the ps4 games.
Method Number One:
The first way involves using video capture cards. The method is not at all complicated; however, you will have to make some investments to get all the apparatus ready for the setting. The things you need for the system includes your laptop a video capture card, connection to wifi or ethernet, file sharing compatibility, and an HDMI cable.
Our Recommended Video Capture Device:
Blackmagic Design Intensity Shuttle
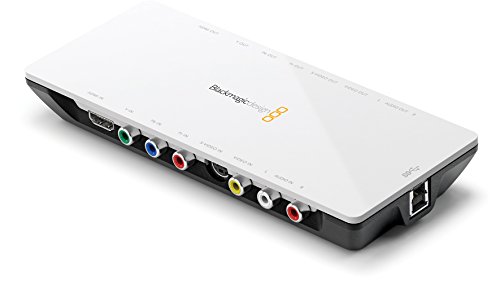
Click here for more info on the Blackmagic Design Intensity Shuttle
First, you need to turn on the file sharing. In the ps4 menu under the setting tabs, you will find the option of network settings, using the network option, you will get access to your Internet connection. In the absence of wireless internet, you can use a router and use the configurations of PS4 and the computer to connect. After you establish the connection, you can now stream between the two machines. You will then have to join a video capture card to your laptop using the USB port. The video cards come with an installation suite, and the software is easy to install and setup. You need an s-video connection that you can get from the retail outlets and use this connection to attach the video card to the ps4 machine. Look out for the HDMI-In link with the capture card whereas the HDMI-Out will connect to the ps4 gaming console. Run the software and turn on the ps4; the software will auto-track the ps4 and display it on your laptop screen.
Method Number Two:
You have with your gaming console the availability of Sony Remote Play, a tool that lets your stream ps4 on the laptop. The system allows for remote connection to the PS4, and you can enjoy your gaming easily. Just like the first approach for this setting, you’ll need a laptop, your gaming console, a USB cable, and your account set up on the PlayStation platform. For this arrangement to work your internet connection should be a high-speed Internet.
You will also need an LCD screen at hand as before setting it on the laptop you will need it for some ps4 system settings.
You need to download the latest remote play app from Sony website compatible with your laptop having windows or Mac operating system. The app will come with the installer, and you can easily download the application.
After the installation, turn on your ps4 settings to enable the Remote Play Connection. You will have network access for the games by having your PS4 activated or leave it in rest option. If you are not sure that the console is on rest mode by default, you can check it by going in the power save settings, and if it is not in the rest mode, you can set it to rest method in the settings.
Turn on the “Enable Turning On” to run PS4 from the network. Turn on the Remote App on the laptop and find the settings option on the app. Over here, you can set up resolution settings that are ideally at 720p. Use the USB cable to connect the controller to your computer.
Turn on the “Enable Turning On” to run PS4 from the network. Turn on the Remote App on the laptop and find the settings option on the app. Over here, you can set up resolution settings that are ideally at 720p. Use the USB cable to connect the controller to your computer. You can pair the controller with the laptop by plugging in the USB adapter and push it for a few seconds. On the Remote Play app, you will see the start button, and when you click on the button, you will go to the Play station login screen on the network, and the app will pick your ps4 in the system. You can stream the games on your laptop this way.
These two methods are not difficult to follow, and you can check some online tutorials and videos to understand the settings further. Happy gaming!